
Introduction:
I think I can say with a measure of surety that pretty often doll photographers are not taken seriously. A lot of times, though, it is our fault. We - as doll collectors and affectionados - get so carried away by OMGlookithowPRETTY!!! feeling, we forget that others may not see it the same way. However! We can totally help the average Joe (or Jane) see the awesomeness of our dolls. In this tutorial I will attempt to give some tips on various aspects of the doll photography styling. If there are points that I did not cover, and you think I might know something, please do not hesitate to ask. I'll be happy to add to this tutorial. Also, if you have tips to offer - please do so, and I can include them, as well (with hat tip to the author of suggestion, of course).
On to the tips!
Posing:
 The rule of thumb I use when I pose my dolls for a shot is to check their pose against my body - that is, if I had to sit like that, where would my arms be? How would my head be tilted if was looking towards there? This seems very basic, but there are tons of photos I'm seeing where Momokos are sitting like - pardon the expression - Barbies, all stiff and limp, vacant stares... :/
It can (and should) be much better with more articulated dolls!
If you are the kind of person who "talks with their hands", use that on dolls, too - a gesture can convey so much emotion or expression (but avoid over-dramatizing). If you are one of the stoic ones - watch people who talk with their hands and pick up their tricks. Use mirrors to look at where your arms/hands/legs would be in a particular pose and copy that with the doll.
If you find that your doll does not bend in the way you want her to (very possible occurrence with wild imagination), try to see if you can modify the pose a little while still sticking to the general idea. If that does not help, try to see if creative cropping or a convenient prop can do the trick.
Despite the fact that their faces are painted on, a variety of expressions can be achieved by tilting/turning the doll's head, different lighting (straight on light makes for more blank expressions; dramatic side light will make the doll look more, well, dramatic; a light side light could make the doll look coy), different angles (from bottom looking up can make the face look more hopeful or inspired), etc. Play with the light - you'll see how different her face will look.
note how Zhen's expression changes from frame to frame - just with different tilts of her head.
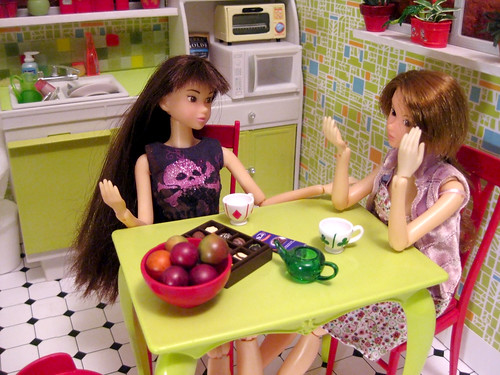
Stability can be an issue, though Momokos usually can stand on their own.
Note how I'm using the edge of the couch to prop Tuuli, so she can be in a more "risky" pose.
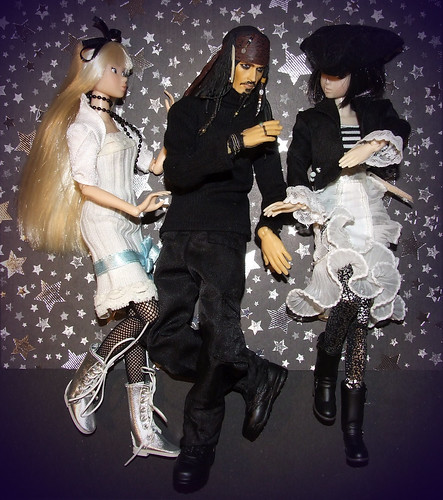
However, if you're trying get a pose where a doll is dancing, jumping, skating, etc. it is impossible to pose her vertically without a stand. A way out, if you are shooting with a backdrop (not out in the middle of the woods/beach/city), is to lay everything out horizontally - just put your backdrop on the floor/table, arrange your doll in the pose you want, and voila! It may be necessary to add a little propage underneath the limbs that are supposed to be in the air, so they are not all laying flat against the background.
There are several sticky tacky substances to help secure props in the doll's hands. However, I find that most times I can just sort of wedge the item between her palm and thumb.
A basic rule of thumb will be - TRY IT OUT. Pose, look through the viewfinder or at LCD screen of your camera, see it if is working. Shift the pose a bit, or shift the angle of shooting, see if it's better. On an average shoot, if I'm shooting for a still single image, I will typically shoot anywhere from 4 to 12 photos of just one pose, taken from different angles, maybe with different lighting, definitely with slightly different posing. If I'm shooting for a comic, the number of photos for one single frame (not page) will be closer to 7-15 photos. For the calendar, I did around 30 photos per single scene (calendar page).
It is really worth it, trust me. It will REALLY suck if you are done with the shoot, all the props are put up, and then it turns out that if ONLY you paid attention to that hand that is lining up awkwardly with that scarf.... By taking many photos of the same subject from slightly different angles, you can avoid such a problem.
Speaking of which - pay attention to tangents - my boss uses a very specialized professional term "kissing" ^_^ Sometimes, a line of the background will line up with the arm or leg or skirt or bag or whatever (tangents) or two elements will be juuuuuuuuuuust touching each other ("kissing"), creating an awkward unintentional focal point. You want to avoid that. Even if you think it's no big deal, in reality, even if people won't look at the photo and go, "OMG! Look at all them TANGENTS!" - the photo will just look less awkward, less cluttered and all around better without them.
Styling:
It may not be immediately noticeable to you when you shoot, but when you see the photo, all the stray hairs and rumpled clothes will jump out at you or at people who will view your photos..
It is much better to spend a little longer on setting up the shot than end up with unusable image.
Brush that hair! Smooth it out!
I've been seeing a lot of poorly fitting clothes on girls. This common problem is very easily remedied, if you take a little time to straighten out the sleeves, tuck away seams that show (by twisting the sleeve a bit so the seam ends up away from the camera, for example), smooth out the hems, tuck in or snip stray threads, and hike down or up the articles of clothing that need the hiking intervention.
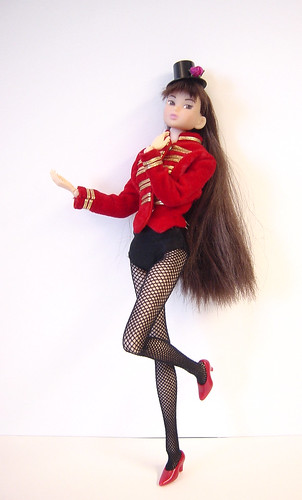
If you wish any piece to fit more snugly than it does (like if you're using a FR piece and it's loose in the bust area), try using a small binder clip to clip the excess fabric in the back (or on the side opposite to the camera, if you're doing a side shot.) Make sure the clip does not show in the photo ^_^
here, Dasha's wearing a vintage Barbie Majorette jacket, which is way too loose - but it's clipped in the back with the binder clip, so you wouldn't know.
Another quick fix that I just discovered is the sticky back velcro circles. You can buy them in office supply stores and in craft stores. They come on a roll or in sheets. You can cut them down to size. I've used them on a too-loose swim suit, just placing the "hooks" part of the velcro a little farther from the edge and it stuck pretty well to the material and held the suit together alright. I would not use it for permanent closure solution, though.
Be conscious of showing velcro closures, snaps, and ties. Because they are human size, the scale of the doll becomes more apparent and the doll looks less real.
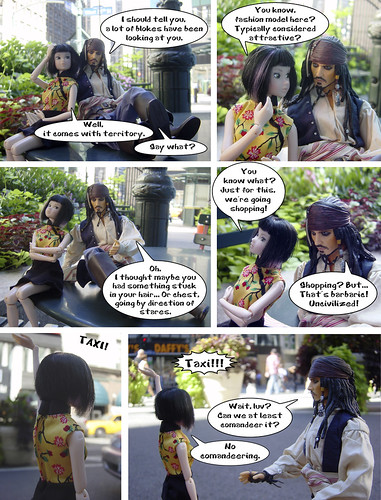
If you are trying to shoot an outfit that would look better billowing (like a full skirt or a cape), it may be worth the effort to string a really thin wire through the hem of the garment, and then shape the hem to your liking. In that case, though, be aware of laws of gravity and draping - your folds and billows should look realistic, unless you're going for the "Chinese painting" effect (which is fine, too, as long as you know what you're going for).

(Zhen's scarf has wire through it so it can drape all pretty).
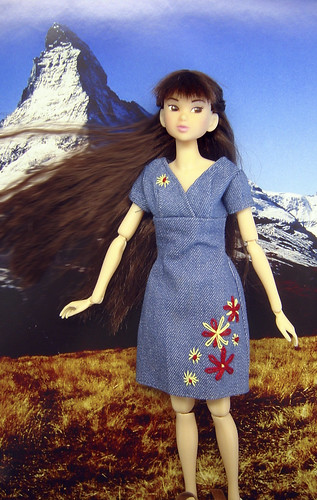

Billowing hair works easy if you shoot horizontally - that way, you don't need to worry about any fans, winds, and style the hair as you want. In this case, though, pay special attention to the light - make sure the light source is either straight on or comes from the direction of the doll's head, so it seems to come from above when you look at finished photo.
Props and Backgrounds:
 I cannot stress enough how important a well-added prop can be in a photo - it can hide an awkwardly twisted arm, hide a balancing stick, or just add an accent that makes the photo.
I myself keep forgetting sometimes that adding a chair or a vase or even just a rug or a teddy bear or a book can add interest to the photo. At the same time, keep in mind - props are NOT the focus of the photo - the doll is. Therefore, make sure the details stay in the background, and the foreground is not cluttered with props.
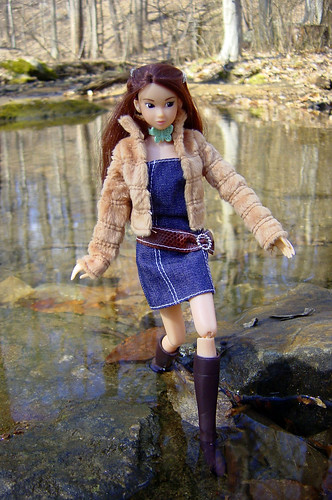
Background fully depends on the point you're trying to make (and you should ideally have a point for each photo you take, otherwise they are called "snapshots") - if you're shooting a doll specifically for the outfit she's wearing, minimal background/props are needed - and the background should be either neutral to or contrasting with the main color of the outfit. Be careful with colors that are complimentary to the outfit - it may get "lost" in the background.
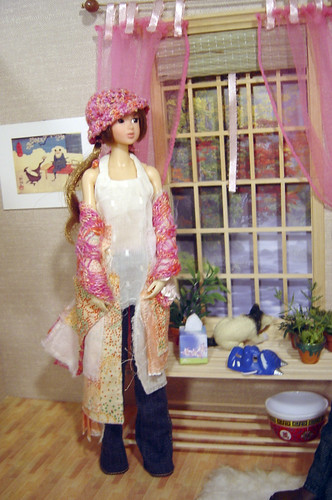
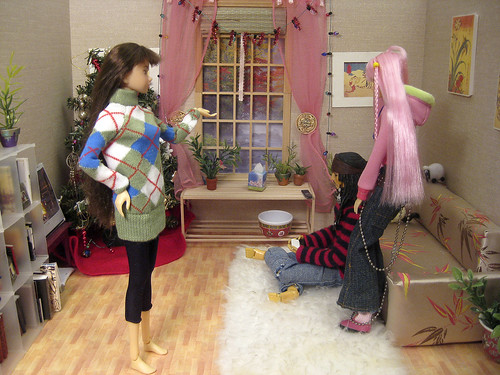
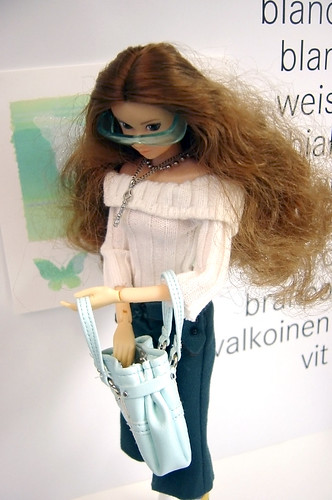
If, however, you're doing a "lifestyle" kind of shoot, then I say - go for as many details as possible. Even the most zen person has all sorts of little personal things laying around their place - so, have a pair of sunglasses laying on the table, or a scarf thrown on the bed, or a newspaper on the armchair - little things will add interest and make things more interesting AND add character and personality to the doll. The more little details are in the background of your scene, the better. Definitely look out for clutter, though - there's a difference between "tons of details" and "clutter". Again, use your own living space as a check point - you know yourself when you need to clean up and when it's a cozy lived-in feeling.
Lastly, a word of caution - DO NOT fall in love with your photos. Attachment clouds judgement. There are no perfect photos. If there were, the world would implode around them. Only through judgement and willingness to get better can we grow as photographers.
I hope you found something new and useful from this tutorial!
No comments:
Post a Comment