
I make hats like the one in this tutorial for most of my 1/6 dolls, so I thought it may be useful for people. These hats will work for action figures just as well as they do for dolls.
It's pretty easy to make, does not require much of sewing knowledge, and produces quite a funky result.
Tools: scissors, thread and sewing needle.
Materials: Sock.
Step 1 - buy a sock. Possibly, even buy two, because usually they have a "buy 1 sock, get the second one free" dealios at most stores.
Seriously, though, the sock that I'm using came from a dollar store, where they have a 3 pairs of baby socks (or young children socks) for $1. Good deals.
The reason I'm using a bebbeh sock is because they have just the right circumference for an average doll head.
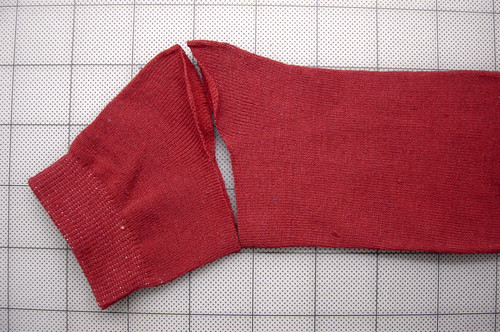
Step 2 - lay your sock flat and cut off the top as shown. The cut off part should be longer on the end that will be the top of hat and shorter in the back of the hat.
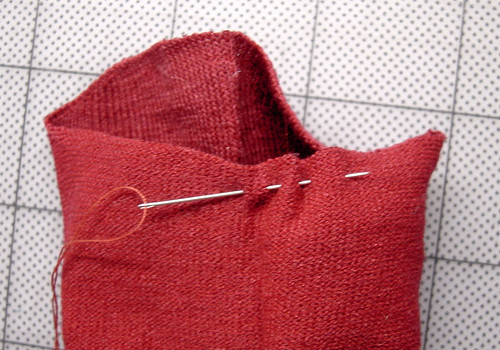
Step 3 - Turn your future hat inside out.
[B]All the operations except the last step will be done with the inside facing out.[/B]
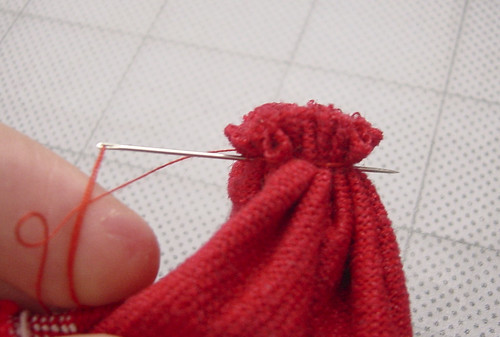
With needle, making small stitches, sew around the cut off part, about 1/8 of an inch from the edge. Don't forget to make a knot on the end of the thread so it stays put.
Step 4 - When you sewed all around the top, pull the thread tight (remember, you have a knot on the other end of the thread that will prevent the thread from pulling out.)
Wrap the thread tight several times around the top of the hat, along the stitch line.
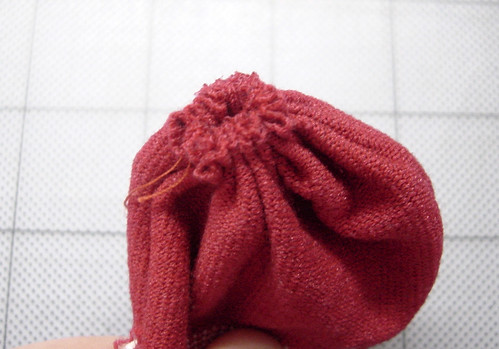
Step 5 - [B]While holding the thread tight with your finger[/B] (as shown), push the needle through gathered part and pull tight (letting go of the thread). This is to give your knot more stability and prevent the hat from coming undone. Do it several times, each time shifting the "point of entry", so that the needle goes in from different directions.
Step 6 - After you've satisfied yourself with all the needle sticking business (or when you're almost out of thread), make a small stitch on or right below the stitch/wrap line but don't pull the needle through right away. Wrap the thread around the needle a couple (not more) times around the needle, and then pull the needle all the way through and tighten the stitch.
If you kept the pressure on, your hat will have a nice tight gathered knot at the top.

Step 7 - Almost done now!
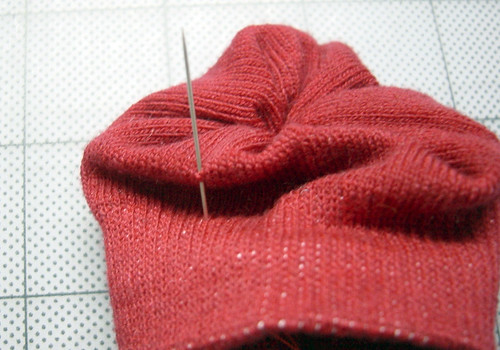
Turn your lovely hat the right side out. It should look something like the picture below. If you have a gap at the top, you didn't keep the pressure on the thread like I told you to, so go back and redo it!
However, I think you'll be just fine and so, with the last effort, pick a fold in the top part of your hat that will be at the back of your figure's head when worn. Then pick a spot in the lower part, possibly where elastic is. Now, push the needle from the inside and sew these two spots together (remember the knot on the end of the thread when you start and finish it the way I showed in step 6).
This is done to fake gravity effects, because the real hat would be most likely heavy enough and fold down naturally. Socks (especially those bought at dollar stores) have a tendency to stick proudly up in the air, which would make your doll/figure look very silly.
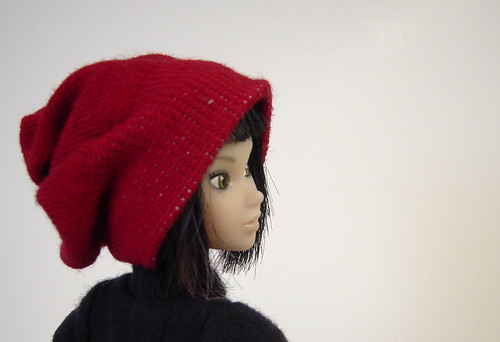
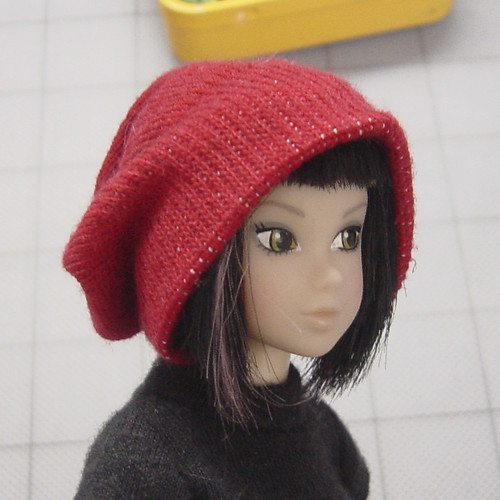
Step 8 - Put the hat on your doll.
Voila!*
If you have any questions, fire away.
------
* I think there's a requirement that at the end of each guide one is supposed to say, "Voila!" so there you have it.
Hope this is useful!
No comments:
Post a Comment